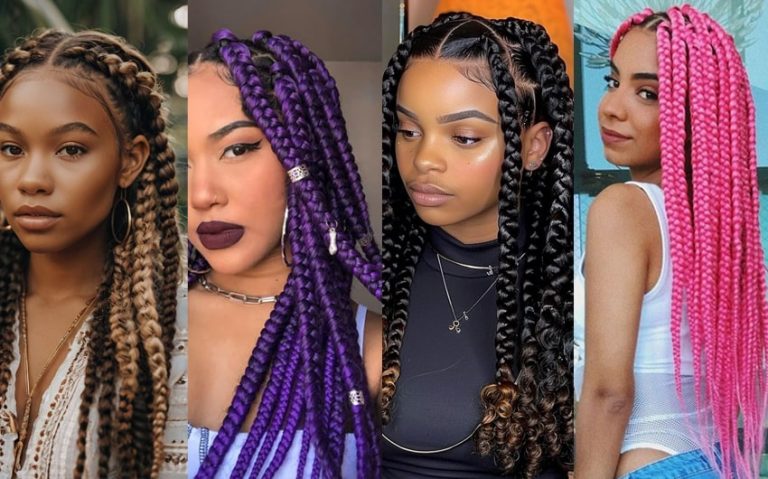
Makeup Trends Everyone Will Be Obsessed With
Beauty constantly evolves, and makeup trends 2024 bring fresh energy to self-expression. Staying current isn’t just about following fashion. It’s about finding creative ways to boost confidence and showcase your true self.
This year’s exciting trending makeup looks include five major styles taking over social media. You’ll discover glazed donut skin, bold graphic eyeliner, and rich berry lips. Colorful lower lash lines and blush draping techniques are also trending.
These beauty trends aren’t just for runways or professionals. Each look adapts to your personal style and comfort level. You’ll find practical tips for beginners and seasoned enthusiasts alike.
These viral beauty trends reflect a shift towards creativity and individuality. They encourage playful experimentation in beauty culture. Get ready to explore new looks while feeling supported throughout your journey.
Key Takeaways
- Today’s beauty styles offer accessible ways to express your unique personality and boost confidence through creative self-expression
- Five major looks dominate 2024: glazed donut skin, graphic eyeliner, berry and wine lips, colorful lower lash lines, and blush draping techniques
- These styles work for all skill levels, from beginners to experienced beauty enthusiasts, with adaptable techniques for everyone
- Current beauty culture emphasizes individuality and experimentation over rigid rules, encouraging personal interpretation of popular styles
- Each trend featured provides practical tips and makeup inspiration you can immediately apply to your daily routine
- You don’t need professional training or expensive products to recreate these stunning looks at home
Glazed Donut Skin: The Luminous Glow Everyone Wants
The glazed donut makeup trend is taking over. It creates a radiant, wet-look finish that catches light from every angle. This look makes skin appear hydrated, healthy, and almost ethereal.
Glazed skin celebrates a natural approach to beauty. It enhances your complexion instead of masking it. The goal is to achieve a freshly moisturized look that’s plump and youthful.
Understanding the Glazed Skin Phenomenon
Hailey Bieber popularized this trend with her signature aesthetic. Her makeup artist compared her glow to a Krispy Kreme donut’s shiny glaze. The name stuck, inspiring beauty fans everywhere.
This trend builds on the K-beauty glass skin movement. Glazed skin adds strategic makeup for a wet appearance. It celebrates skin texture and natural beauty rather than concealing it.
Social media has boosted this trend’s popularity. Glazed skin looks stunning in photos, making it a hit with influencers. Its dewy finish suggests health and proper hydration, qualities everyone finds attractive.
Essential Products for a Wet-Look Finish
Achieving glazed skin requires specific product formulations. Start with skincare and primers that provide real hydration. Look for ingredients like hyaluronic acid and glycerin for a plump appearance.
Choose foundation or tinted moisturizer with a luminous finish. Avoid matte products that absorb oils. Seek out formulas with light-reflecting particles for a natural glow.
Liquid highlighters are crucial for this wet look technique. Cream or liquid formulas create believable dewiness. Choose champagne or golden tones for warmth, or pearl and silver for a cooler effect.
Here are the must-have product categories for glazed donut makeup:
- Hydrating face mist: Prepares skin and adds an initial layer of moisture before makeup application
- Illuminating primer: Creates a reflective base that shows through your foundation
- Dewy foundation or tinted moisturizer: Provides sheer to medium coverage without hiding your skin’s natural texture
- Liquid highlighter: Delivers concentrated luminosity to specific areas for maximum impact
- Hydrating setting spray: Locks everything in place while maintaining that fresh, wet appearance
The setting spray is crucial for a cohesive, glowing complexion. Skip powder and use a dewy-finish spray with humectants. This keeps your skin looking moisturized all day.
Layering Techniques That Lock in the Glow
Successful glazed skin requires strategic layering to build luminosity gradually. Start with clean, treated, and moisturized skin. Apply hydrating primer with fingertips or a damp sponge, focusing on dull areas.
Use a stippling motion to apply luminous foundation. This maintains skin texture for a natural look. Highlighter placement is crucial. Apply to high points of your face where light naturally hits.
Here’s the optimal application sequence for glazed skin:
- Apply hydrating face mist and let it absorb for 30 seconds
- Smooth on illuminating primer, focusing on the center of your face
- Stipple foundation or tinted moisturizer for sheer, breathable coverage
- Pat liquid highlighter onto the high points with your ring finger
- Spray with dewy setting spray, holding the bottle 8-10 inches away
The difference between luminous versus oily is in placement and quantity. Keep intense shine on face high points. Use less product on your T-zone, which naturally produces more oil.
Allow each layer to set before adding the next. This creates a natural glow from within. For touch-ups, use a facial mist to refresh without disturbing your makeup.
Bold Graphic Eyeliner That Commands Attention
Graphic eyeliner offers endless possibilities for creative self-expression. It transforms your eyes into an artistic canvas. You can showcase your personality and style with bold eyeliner looks.
This trend is versatile and inclusive. You can start simple and work up to complex patterns. Graphic liner looks great on all eye shapes and ages.
Trending Shapes and Styles to Try Now
Graphic eyeliner has moved beyond traditional wings. The floating crease is popular, creating dimension above your natural crease. It’s editorial yet wearable for daily life.
Extended wings are getting a modern update. They stretch further toward your temples for a lifted effect. Some artists curve them upward for an avant-garde finish.
“Eyeliner is the most dramatic makeup tool we have. It can completely transform not just your eyes, but your entire face.”
Geometric shapes are an exciting direction in eyeliner trends. Think sharp angles, triangles, or rectangular blocks of color. These designs look complex but need steady hands and the right tools.
Negative space designs leave strategic gaps in your liner. You might draw a thick line with a break or create a double wing. Color-blocked styles let you play with multiple shades in one look.
Double-winged looks add drama with two separate wings. This style is popular among celebrities and influencers. You can use the same color or experiment with contrasting shades.
Products That Deliver Precision and Impact
The right eyeliner makes a big difference for creative eyeliner designs. Gel liners offer incredible pigmentation and staying power. They work well for thick, bold lines with more color control.
Liquid liners come in brush-tip and felt-tip applicators. SHEGLAM makeup products feature both types, allowing artists to create everything from fine, precise lines to bold, dramatic shapes. Felt-tip liners from SHEGLAM are particularly beginner-friendly, offering stability without sacrificing style.
Pencil liners now include gel-based formulas that glide smoothly. They’re perfect for softer looks or blending. Use them to map out designs before using permanent formulas.
Consider these factors when selecting your eyeliner:
- Pigmentation: Look for rich, opaque color that shows up in one stroke without multiple layers
- Longevity: Waterproof or long-wear formulas prevent smudging and fading throughout the day
- Removal ease: Some formulas require oil-based removers, while others wash off with regular cleanser
- Drying time: Quick-drying formulas prevent transfer but leave less room for adjustments
- Finish options: Choose between matte, glossy, metallic, or glitter finishes based on your desired effect
Match your formula to your skill level and style. Complex designs benefit from gel liners that don’t dry quickly. Simple, bold lines work better with fast-drying liquid formulas.
Mastering Sharp Lines Without the Stress
Creating clean, symmetrical graphic eyeliner can be easy with smart techniques. Tape is an excellent guide for straight lines and sharp angles. Use it as an edge for perfectly crisp results.
Your hand position is crucial. Rest your elbow on a flat surface for stability. Hold your mirror at chest level to look down while keeping your hand steady.
Practice on the back of your hand first. This builds muscle memory and helps you understand pressure. You’ll learn which movements create the smoothest lines.
Keep concealer nearby for quick corrections. Use a small, flat brush to clean up wobbly lines. This works better than makeup remover and preserves the rest of your eye makeup.
Start with light pressure and build up gradually. You can always make lines thicker or darker later. Begin with light strokes, then fill in with more confident ones.
For symmetry, create one design completely first. Use it as a reference for the second eye. Take a photo if needed to compare angles and placement.
Embrace imperfection in your artistic eyeliner. Your unique interpretation makes the trend yours. Even professional looks often feature intentional asymmetry and hand-drawn qualities.
Build your skills gradually with simpler designs. Master a standard wing before trying complex shapes. Each success improves your confidence and hand control. You’ll develop your own signature eyeliner style over time.
Berry and Wine Lips Making Their Comeback
Berry and wine lipsticks are back, adding sophistication to modern makeup. These rich shades now offer luxurious textures and improved wearability. They’re perfect for everyday glamour, moving beyond the heavy formulas of the past.
Dark lip colors signal a shift in beauty trends. People now crave more expressive options after years of nude lips. These deeper tones complement dewy skin without overshadowing it.
Why Deep Tones Are Dominating Right Now
Deep lip shades reflect a time of boldness and confidence. Fashion runways have embraced richer color palettes, influencing beauty trends. This creates the perfect environment for burgundy lipstick to thrive.
These colors work well across multiple seasons, unlike some limited trends. A wine-toned lip looks great with summer tans and winter outfits. This makes deep lip shades a practical choice for beauty lovers.
Modern formulas have changed how we use these colors. Today’s berry and wine lipsticks offer comfortable mattes, hydrating satins, and lightweight glosses. Dark lips no longer mean dry, cracked application.
Bold lips project confidence and sophistication instantly. They create a polished look even with minimal makeup elsewhere. This makes them ideal for busy lifestyles.
Choosing the Right Undertone for Your Skin
Finding the perfect dark lip color requires understanding undertones. Not all berry or wine shades work for every complexion. The key is identifying whether a color has cool, warm, or neutral bases.
Cool-toned berries have blue or purple undertones that suit fair to medium skin. These shades make teeth appear whiter and create stunning contrast. Think of colors like raspberry or true grape.
Warm-toned wines have red or brown bases that flatter medium to deep skin tones. Plum lipstick with reddish undertones creates a sophisticated effect. These shades enhance natural warmth without looking harsh.
Test shades in natural lighting for the best results. Apply a small amount to your lips and check how it looks. The right shade will brighten your complexion, not wash you out.
Skin Tone
Best Undertones
Recommended Shades
Avoid
Fair
Cool blue-based berries
Raspberry, cool plum, true burgundy
Overly brown or orange-toned wines
Medium
Neutral to warm reds
Classic wine, mauve-berry, rose burgundy
Extremely cool purples
Tan
Warm red-browns
Brick red, warm plum, terracotta berry
Pale pinks or very cool tones
Deep
Rich warm tones
Deep wine, chocolate berry, rich burgundy
Overly light or pastel shades
Application Tricks for a Flattering Finish
Proper prep is key when wearing wine lipstick or any deep shade. Start with exfoliated, moisturized lips to prevent uneven application. Gently buff away dry patches with a soft toothbrush or lip scrub.
Lip liner is essential for dark colors. Choose a liner that matches your lipstick or is slightly deeper. Outline and fill in your lips to prevent feathering and extend wear time.
Application technique depends on your desired finish. For matte looks, apply directly or use a lip brush. Blot once, then apply a second layer for long-lasting color.
Satin and glossy finishes need less product. Apply one even layer, focusing on the lip center first. Press lips together to distribute color, adding more only where needed.
Balance your makeup when wearing bold lips. Keep eye makeup soft and let your lips shine. Subtle neutral shadow, defined lashes, and glowing skin complement statement berry tones.
Don’t fear touch-ups throughout the day. Carry your lipstick and liner for quick refreshes. Modern long-wear formulas make maintenance easier, ensuring you always look polished.
Confidence is key when wearing dark lip colors. Rock them at meetings, brunches, or evening events. These versatile shades work for many occasions. Your comfort and enthusiasm make any look shine.
Makeup Trends Featuring Colorful Lower Lash Lines
The lower lash line is perfect for creative eye makeup. This trend is popular because it’s bold yet easy. A quick swipe of color under your eyes modernizes any look.
Lower lash makeup works for those who love color but fear full eyeshadow looks. It draws attention to your eyes in unexpected ways. Even simple makeup becomes editorial with this small addition.
This technique adapts to any comfort level. You can go subtle or dramatic based on your mood and occasion.
The Most Flattering Color Pairings
Basic color theory helps choose the right shades. Complementary colors create striking contrast and enhance your eye color.
Here are the most flattering colored lower lashes combinations based on your natural eye color:
- Brown eyes: Cobalt blue, emerald green, or deep purple create stunning contrast and make brown tones appear richer
- Blue eyes: Warm copper, burnt orange, or terracotta shades intensify the blue and add warmth
- Green eyes: Burgundy, plum, or wine tones make green eyes sparkle and appear more vivid
- Hazel eyes: Forest green, bronze, or golden yellow highlight the multiple tones in hazel eyes
Some shades work well on everyone. Warm bronzes and coppers offer a soft intro to colorful eyeliner. Teal and turquoise have universal appeal with both warm and cool undertones.
Keep your upper lid neutral if you want the lower line to shine. Use complementary shades on top and bottom for a more intentional look.
Precise Application Without the Mess
Mastering lower lash makeup depends on choosing the right formula. Each product type offers unique advantages for different looks.
Pencil eyeliners provide the most control for beginners. They glide smoothly and can be smudged for a softer effect. Look for creamy formulas that set after application.
Gel formulas deliver intense pigment and work for precise lines. Apply them with a small angled brush for maximum control. These typically last longer than pencils.
Liquid liners create sharp, graphic results. They’re ideal for bold, crisp lines once you’ve practiced. Choose waterproof versions to prevent smudging.
For precise application, try these techniques:
- Rest your elbow on a stable surface to steady your hand
- Look straight into a mirror rather than pulling your eye to the side
- Start from the outer corner and work inward in small strokes
- Place the color directly on the lash line rather than below it
- Use a cotton swab to clean up any mistakes immediately
Use ophthalmologist-tested products to avoid irritation. Never apply liner inside the waterline if you have sensitive eyes. Set the eyeliner with matching eyeshadow for longevity.
When and Where to Rock This Bold Look
This trend is versatile. You can adapt it to suit any setting by adjusting intensity and color choice.
For work or professional settings, stick with softer versions. Navy blue, deep green, or bronze create interest without being too bold. Apply color only to the outer third of your lower lash line.
For casual weekend wear, embrace brighter shades across your entire lower lash line. Experiment with fun combinations like coral, lavender, or bright teal. Keep other makeup minimal to focus on your eyes.
For evening events or nights out, go full intensity with metallics or jewel tones. Layer darker shades with shimmer for extra dimension. This amplified look photographs beautifully under different lighting.
For creative or artistic environments, use this technique for self-expression. Mix colors, create ombré effects, or pair with graphic liner on top. These settings welcome bold experimentation.
Colored lower lashes are easy to adjust to your confidence level. Start small, then extend the color as you get comfortable. One colorful line can make a big statement.
Blush Draping for Soft, Sculpted Dimension
The blush draping technique is revolutionizing color and dimension in makeup. It goes beyond simply applying blush to your cheeks. This method lifts, sculpts, and warms your entire face.
The result is a romantic, naturally flushed look that photographs beautifully. Think of it as contouring’s softer, more flattering cousin. It offers dimension without harsh lines, working with your skin’s natural warmth.
The Origins and Philosophy Behind This Technique
Makeup artist Way Bandy created the draping technique in the 1970s. He saw it as a natural alternative to heavy contouring. Bandy used warm tones to reshape the face gently.
Contouring with blush relies on blush colors, not gray or brown shades. You sweep the product from your cheeks up to your temples. Some styles extend across the forehead and nose.
This creates a lifted, youthful effect that mimics natural flushing. It enhances your complexion rather than creating artificial shadows. The technique works for all age groups and skin types.
Choosing Colors That Complement Your Complexion
Your skin’s undertone should guide your color selection. Fair skin glows with rosy pinks and soft mauves. Medium skin tones shine with peachy pinks and warm corals.
Deeper complexions look stunning in rich terracottas and deep plums. Choose colors that look natural when intensified on your skin. Formula selection matters just as much as color choice.
Powder blushes work well on normal to oily skin types. Cream formulas suit dry or mature skin better. Liquid blushes offer the longest wear and most natural diffusion.
Many artists recommend using multiple shades in the same color family. Start with a lighter shade as your base color. Then use a slightly deeper tone for added depth.
Skin Tone
Recommended Blush Colors
Best Formula Type
Placement Priority
Fair/Light
Rosy pink, soft mauve, light peach
Powder or cream
Cheekbones to temples
Medium
Peachy coral, warm rose, apricot
Cream or liquid
Cheekbones, temples, nose bridge
Deep
Terracotta, deep berry, warm plum
Cream or liquid
Full draping with extended placement
Cool Undertones
Pink-based shades, mauve tones
Any formula
Focus on cheekbone area
Warm Undertones
Peach, coral, terracotta shades
Any formula
Extended temple and forehead placement
Mastering the Application for Flawless Results
Understanding proper blush placement is key to this technique. Start with a clean face and base makeup. Prime your cheeks lightly to help the blush blend seamlessly.
Use an angled brush for powders or a damp sponge for creams. The right tools make blending easier. A fluffy brush helps diffuse edges for a soft-focus effect.
Smile to find your cheek apples. Apply your main shade here first. Sweep the color upward towards your temples in a diagonal motion. This creates the lifted appearance of blush draping.
Blend edges with gentle circular motions. There should be no harsh lines. Build the color gradually rather than applying too much at once. It’s easier to add more than remove excess.
For extended draping, dust blush across your temples and forehead. Some add a touch down the nose bridge for warmth. This creates cohesion across your entire face.
Coordinate your draped blush with other face products. Apply bronzer below the blush line for subtle definition. Add highlighter to your high cheekbones, just above the blush.
The technique adapts to different face shapes. Round faces benefit from upward-angled application. Square faces look softer with circular blending motions. Oval faces can handle more dramatic placement.
Practice makes perfect with this draping makeup technique. Start light for daily wear. Save dramatic draping for special occasions. The trend is flexible and forgiving.
Natural lighting helps you assess your work. Step back to see the overall effect. What looks bold up close often appears natural from afar.
The final result should be sculpted cheeks with a soft, romantic flush. Your face should look lifted and defined without harsh lines. The warmth should feel cohesive and intentional.
Making These Trends Work for Your Personal Style
Adaptable beauty trends are flexible. You don’t need to copy every look exactly. Start small with one element that appeals to you. Try a hint of glazed skin or a colorful lower lash line.
Personalized makeup means making inspiration your own. Mix graphic liner with berry lips for a fresh look. Pair blush draping with everyday makeup for a unique style.
Different settings need different approaches. Use sheer formulas and neutral shades for professional environments. Save bold looks for evenings out or creative spaces.
Let your personal style guide your choices. Test new products on weekends when you feel relaxed. Practice techniques until they become easy. Skip trends that don’t feel right for you.
The goal isn’t perfection. It’s about enhancing your natural features and boosting confidence. Honor your preferences while staying open to new ideas.
These trends offer exciting starting points. Take what works and create looks that feel authentic. The best trend is the one that makes you smile.